Account Overview
Chapter 2
Getting Started
Chapter 3
Control Panel Overview
Chapter 4
FTP Instructions
Chapter 5
SSH / Telnet
Chapter 6
Email Software Setup
Chapter 7
File Manager
Chapter 8
Change Password
Chapter 9
Mail Manager
Chapter 10
Site Statistics
Chapter 11
Mailing List
Chapter 12
Microsoft FrontPage
Chapter 13
Site Creation Tool
Chapter 14
Counters
Chapter 15
Protect Directories
Chapter 16
Redirect URL
Chapter 17
Search Engine
Chapter 18
Formmail
Chapter 19
PGP & PGP Mail
Chapter 20
Mime Types
Chapter 21
Anonymous FTP
Chapter 22
Archive Manager
Chapter 23
SSL (Secure Server)
Chapter 24
MySQL
Chapter 25
Shopping Cart
Chapter 26
CGI-bin
Chapter 27
Real Audio / Real Video
Chapter 5 - Telnet / SSH
Gaining Telnet Access
Telnet Access is only available using SSH.
Any user gaining Telnet Access assures us that they are an experienced Telnet user. In the event that such user causes any server crashes/damages, their Telnet Access privileges will be revoked and denied for any future Telnet use.
If you need telnet access to our servers, it can only be done using SSH. We have it set up to use RSA authentication. You will need to create a key using your PC's SSH software, then use SSH feature within your Control Panel to upload the key to our servers. Once it is uploaded, you will be able to connect to our servers using SSH. We do not provide an SSH program for your use. However, as a suggestion only, you can visit http://www.vandyke.com and download their SecureCRT software. This software is available as a 30 day trial and afterwards must be purchased. Below we have provided instructions on setting up the software.
Setting Up SecureCRT Software
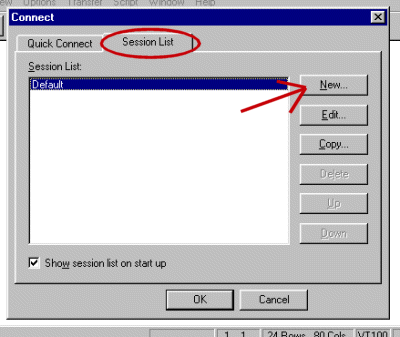
Each time you run SecureCRT the following box will appear on your screen.
Ensure that the Session List tab is selected and then click on the New button on the right hand side. This will create the session that you will use each time you telnet into your account.
Following is a screen shot of the next screen you will see. (Instructions for this area follow this screen shot.)
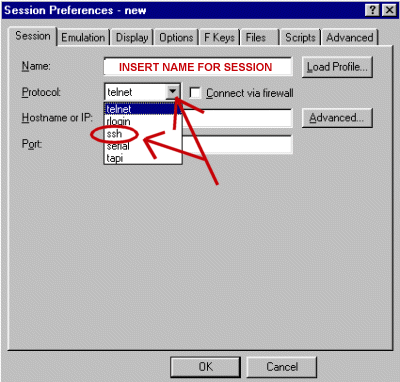
NAME - In the text box next to Name, input a name that SecureCRT can use to identify this session that you are creating.
PROTOCOL - Select SSH from the drop down box.
As soon as you select SSH, additional boxes will appear below that selection as follows.
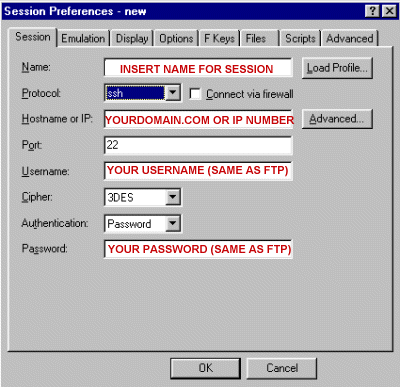
Connect via firewall - Leave this box unchecked.
HOST NAME OR IP - Enter your domain name or IP number in this text box. (i.e.. yourdomain.com)
PORT - Leave the default number that is there.
USERNAME - this is the username that you use to FTP to your account.
CIPHER - Select 3DES
AUTHENTICATION - Select Password from the drop down box.
PASSWORD - This is the password for your account, the same one you use to FTP to your account.
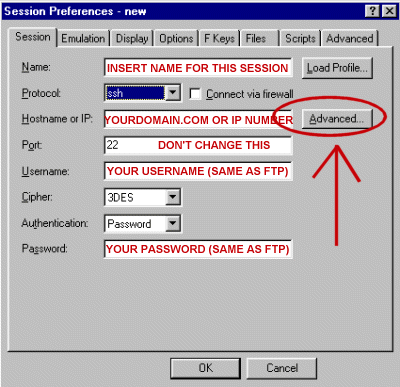
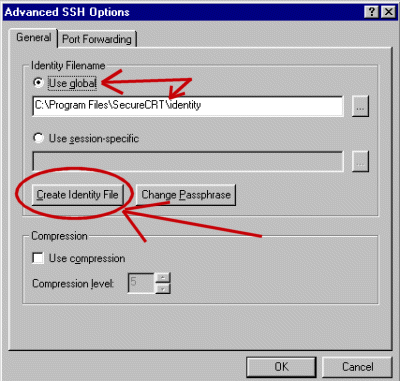
Next you will need to click the Advanced button as indicated in the screen shot below. Be sure to hit the Advance button and not the Advance tab.
In the next screen (Advanced SSH) the Use Global radio button is selected by default, and the text box directly beneath that will automatically be filled in with a file location.
Next locate and click on the Create Identity File button as indicated in the screen shot below. (Everything else on that screen should remain as is.)
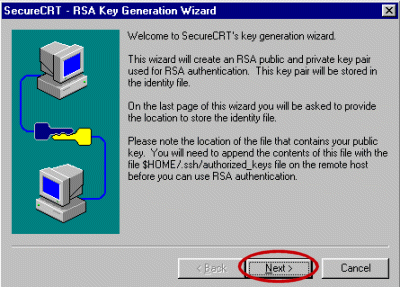
The next step will generate the key that will identify to your sessions. This key will be uploaded the first time that you Telnet to your account. Click on Next as indicated in the screen shot.
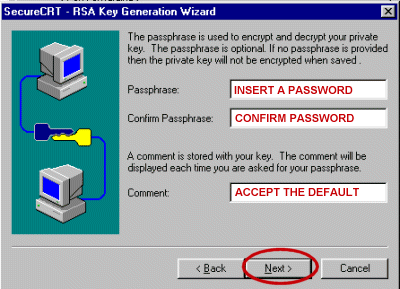
In the next screen you are asked to insert a Passphrase, by providing this passphrase your key will be encrypted. Next you are asked to Confirm that passphrase just as you are when you provide a password. Once you've provided this information, click on Next as indicated in the screen shot below.
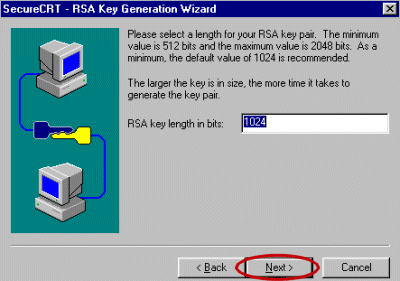
In the next screen you are asked for a length for your RSA pair, just accept the default and click Next as indicated in the screen shot below.
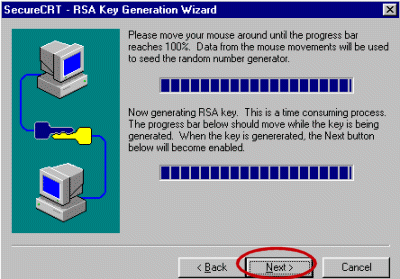
In the next screen your key is actually generated, move your mouse around until the status bars are complete and then click on Next as indicated in the screen shot below.
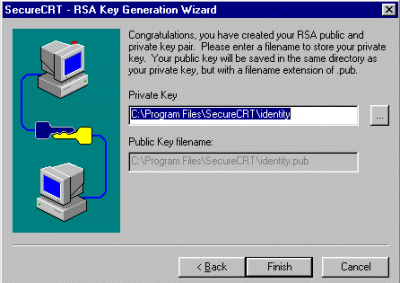
In the next screen you are prompted for a location in which to save your Key and Key Pair, you can accept the default, however if you want this information saved in a different location be sure to write down the location as it will be needed when you Telnet to your account the first time. Also, you should save both files in the same location. Click on the Finish button as indicated below when you have selected the location.
You are now returned to the Advanced SSH window, just click on the OK button at the bottom of that window to close that screen, as which point you are returned to the Session Preferences Window, again click on the OK button at the bottom of that window to close that screen.
You are now ready to Telnet to your account by clicking on File and then on Connect or you can click on the Connect icon (3rd icon from the left).
When you have successfully connected to your account, you will be prompted to save the key that you just generated. Follow the instructions on your screen and once you've done this you are ready to work within your account. From here it's just like a normal Telnet session.
Remote Site Disconnected Message
If you receive a Remote Site Disconnected message, don't be alarmed. Ensure that you have properly set up your SSH software, if you are still unable to connect, attempt to connect several more times so that we can capture the correct information from your dial up, and then submit the Technical Support Request Form letting us know that your attempt to connect was not successful. This process can take up to 24 hours to complete, so be patient and check your login status after 24 hours. If you are still unable to connect after 24 hours, contact us again and we will attempt the process again.